Last Updated on October 4, 2026 by Umar Farooq
A wall mounted ironing board fixed into solid framing will take decades of pressing; the identical board fixed into plasterboard anchors will sag, rack and pull loose inside a year. Everything else about this purchase — mirrored door or plain, recessed or surface-fixed, maple or MDF — is taste. The fixing is not taste. It is the only part that decides whether the thing works.
That is the whole difference between this page and a furniture listing. A wall-mounted board is a cantilever: you push down at the far end, twelve to sixteen inches out from the wall, and that force arrives at the top fixings multiplied. Hang it off the right thing and it is rigid for life. Hang it off the wrong thing and the first proper shirt is the beginning of the end.
Disclosure: washerfixlab.com is a participant in the Amazon Associates Program. If you buy through a link on this page we may earn a commission, at no extra cost to you. We choose products on specification and fit, not on commission, and we say when something is not worth buying.
Measure the clearance first — you may not need one at all
Free, takes two minutes, and it stops a proportion of readers spending anything.
Stand where the board would be and measure three things. The run of wall: the cabinet or bracket itself needs 14 to 48 inches of uninterrupted wall at the mounting height, with no switch, socket, radiator pipe or window reveal in it. The projection: the board sticks out 12 to 16 inches when it is down, and you need that clear of the door swing, the washer door and anything on the floor. And the standing room: you work along the long side, so you want the board’s length plus roughly two feet of floor to move along it.
If you cannot find all three, a wall-mounted board is not the answer and forcing it in will produce something you resent. The alternative costs almost nothing: a pressing mat on a solid worktop. A dense felted mat on a kitchen counter or a chest freezer gives you a firmer, flatter surface than most domestic boards, it stores rolled up in a drawer, and it needs no wall at all. Oregon State University Extension’s description of the operation makes the point for you — pressing is “smoothing and shaping garments or articles by heat, moisture, and pressure” (Pressing Skills, OSU Extension) — and pressure is better served by a countertop that does not move at all than by any folding structure.
There is a second free win worth naming, because it halves how often you use whatever you buy. Unload the washer within a few minutes of the cycle finishing and shake each item out. The final spin presses the load flat against the drum for several minutes, and the shape it is in at that moment is the shape it keeps; every extra hour sitting there makes the folds harder to remove. Steamer versus iron covers the rest of the free fixes.
Four checks before a wall mounted ironing board will hold
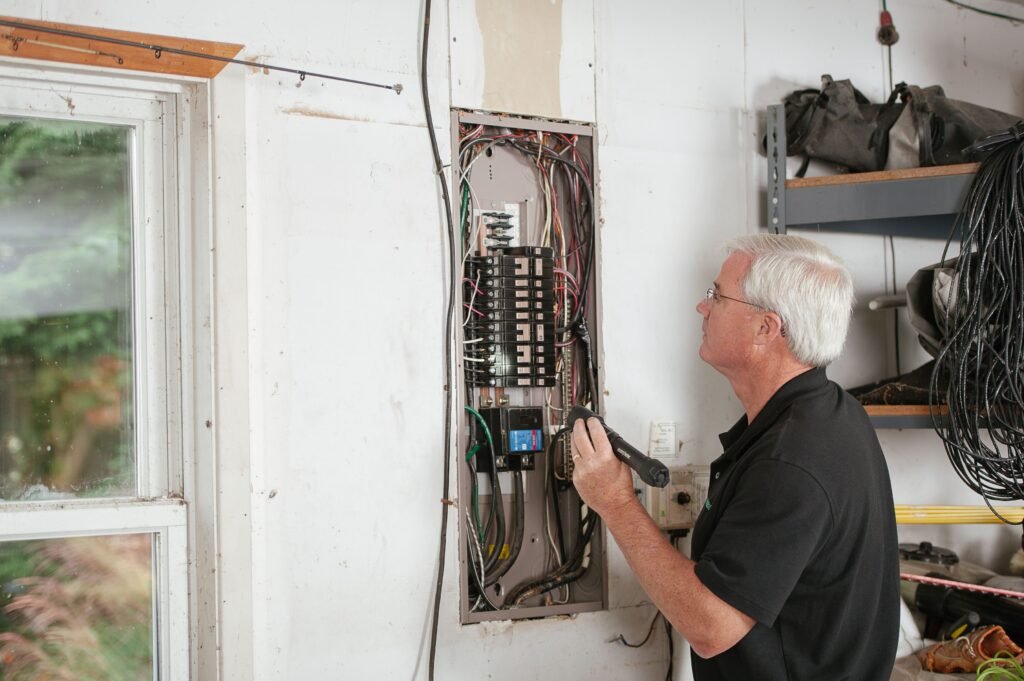
1. Find the actual framing, not the typical framing. This is the check people skip. HUD’s own housing research puts the convention plainly: studs “are typically spaced every 16 inches (generally called 16 inches on center, or 16″ OC)”, and increasing that spacing “to 19.2 or 24 inches on center decreases the amount of lumber needed” (Framing for Strength and Efficiency, HUD Cityscape). Three spacings, all legitimate, all in use. So 16 inches is where to start looking and not what to design around. Find your studs with a detector, mark two adjacent centres, and measure the gap before you order anything.
2. Check the cavity depth against the cabinet depth. A nominal two-by-four is actually an inch and a half by three and a half, so a stud bay in a standard interior wall gives you three and a half inches of depth behind the plasterboard — no more. A cabinet quoting a seven-and-three-quarter-inch depth cannot disappear into that wall. Part of it will stand proud of the finished surface, which is normal and fine for in-wall designs but is not what most people picture when they read “recessed”. Deeper than that and you want a two-by-six wall or a surface-mounted unit.
3. Check the rough opening, not the carton dimension. Two studs at 16 inches on centre leave 14.5 inches of clear space between them. Listings quote overall or trim dimensions, which are wider than the box that has to fit the bay, so the number in the title tells you almost nothing about whether it will go in. Find the rough-opening figure in the manufacturer’s installation instructions before you cut anything. If the opening is wider than your bay, you are cutting a stud and framing a header, which is a different job and a different conversation with whoever owns the building.
4. Fix into wood, or into a backing plate. Plasterboard anchors are rated for static hanging loads — a picture, a shelf of paperbacks. A board under ironing pressure is a dynamic cantilever load with leverage behind it, and anchors creep under that. Into studs is the correct answer. Where the studs do not land where you need them, the correct answer is a backing plate: a length of timber screwed across two studs, the cabinet screwed to that. Several cabinets in this class ship with a triangular bracket system for exactly this reason, and the better ones offer an optional extra bracket. Fit it.
Recessed, surface-mounted or bracket-only: three different holes in your wall
The category name hides three genuinely different products, and the installation effort differs by an order of magnitude.
Recessed, or in-wall. You cut an opening between two studs and the cabinet sits in the wall with only its face and door showing. It is the neatest result by a distance and the only one that genuinely disappears. It is also the one that commits you: a hole in a wall is permanent, you need to know what is behind the plasterboard before you cut, and in a rented property it is usually out of the question. Some in-wall units are partially recessed, standing an inch or two proud, because the cabinet is deeper than the three and a half inches the bay gives.
Surface-mounted cabinet. The whole box hangs on the face of the wall and projects four to eight inches into the room. Nothing is cut, the fixings are the only penetration, and it comes off again leaving eight screw holes. It is the sensible choice in a rental, in a masonry wall, or anywhere you do not know what is in the cavity. The trade is that it is visibly a cabinet — which the mirrored-door versions turn into a feature.
Bracket-only. A hinged board on a wall plate with no cabinet at all. Cheapest, slimmest, and it leaves the board and the iron on display. Fine in a utility room, less so in a hallway.
One decision inside all three: which side the door opens, or whether the board swivels. A fold-down board in a corner that swings into a doorway is a daily irritation. Several cabinets allow the door to be hung left or right, and the swivel models rotate the board up to 180 degrees once it is down, which is what makes a cabinet work for a left-handed user or in a tight corner. Decide before you drill, because reversing it afterwards means new holes.
Height is fixed the moment you drill
A freestanding board adjusts between roughly 28 and 38 inches. A wall-mounted one sits wherever you put it, forever, and too low is the single most common regret.
The working height that does not hurt is the one where your wrists are slightly below your elbows with your shoulders relaxed — for most adults somewhere around hip height, and taller than people guess. The easy way to find yours is to set a freestanding board to a height that feels right, iron two shirts on it, then measure it. Mark that on the wall and mount to the mark, not to a number from a listing.
Two of the cabinets below use a triangular bracket system specifically so the mounting height can be chosen at installation rather than dictated by the box. If more than one person in the house irons and they differ in height, split the difference upward — standing slightly stooped is better for your back than pressing with your shoulders raised.
The load rating, and why a press must never go on one
A specification that appears in the small print and matters enormously.
These boards are rated for the downward load of ironing, and the figures published in this class sit around 25 pounds for a slim MDF cabinet and up to about 50 pounds for a heavier unit with a metal holder. That is a working figure for a hand iron and the force you lean on it with. It is not a shelf rating and it is not a static load allowance.
Which rules something out. A domestic steam ironing press weighs 23 to 27 pounds before you push down on it to close the lid, and closing it applies most of your upper body weight through a cantilevered board. A press belongs on a solid worktop or its own stand, never on a wall-mounted board — the board will flex, the closure will be uneven, and the fixings are taking a load nobody designed for.
A standing clothes steamer raises no such problem, since it stands on the floor, but it does want 18 inches of floor beside the board, which is worth folding into the clearance measurement above.
A hot iron and a cupboard door are a bad combination
Short section, played straight.
The appeal of these cabinets is that everything disappears behind a door. The hazard is that an iron takes a long time to stop being dangerous — automatic shut-off cuts the power in anywhere from eight to thirty minutes depending on the model and whether it is upright or face-down, and the soleplate then takes longer still to cool. Shutting a cupboard door on it traps that heat against painted MDF in an enclosed space.
So: the iron goes back in the cabinet when it is cold, not when the shirts are done. If the unit has a heat-shield shelf, that is what it is for, and it is a real feature rather than a decorative one. Never fold the board up with the iron resting on it. And keep the cord routed so the door cannot close on it, because a crushed flex inside a closed cupboard is an invisible fault.
The cover matters here too. A scorch-resistant pad and cover is standard on the better units and is the layer that stops a momentary lapse marking the board permanently — and reading the laundry symbols on the garment is what stops the lapse in the first place.
Covers: measure before you order a replacement
A small, annoying thing worth knowing before rather than after.
Wall-mounted boards are usually shorter and often narrower than the freestanding boards generic covers are cut for. A standard replacement cover bought on size assumption will be loose at the nose, bunch under the garment and transfer every fold of itself into whatever you press. Measure the board’s length and maximum width and buy to those figures, or get the manufacturer’s own refill.
Replace the pad as well as the cover when the time comes. A compressed pad is why an old board gives a hard, shiny result — you are effectively pressing against bare timber or perforated steel, and the padding is what lets the fabric sink slightly so seams do not print through to the face.
Four units, by how much wall you are willing to cut
Published specification and category rank as the listings reported them on 5 October 2026. We have not installed any of these.
Household Essentials StowAway in-wall cabinet — the one that genuinely disappears. The recessed option, and the highest-ranked wall-mounted unit in the category at rank 100 in Ironing Boards. Overall 7.75 by 15.75 by 47.75 inches with a rotating board, interior storage shelves for the iron and accessories, and a stain- and scorch-resistant cover and pad already fitted. The door can be installed opening left or right, which is the decision to make before you start rather than after. At 7.75 inches deep it will not vanish entirely into a standard two-by-four wall, so expect it to stand slightly proud unless you are working with a deeper wall — and check the rough-opening figure in the instructions against your measured stud bay before cutting anything. Sold and shipped by Amazon.
Ivation wall-mounted cabinet — the one for a rental. Surface-mounted, so no hole in anything: 37.8 inches long, 14.2 high and only 4 inches deep against the wall, holding a full-size fold-up board behind a plain door with two garment hooks on the inside. The release lever drops the board one-handed and a built-in clamp holds it when it is folded back, which matters more than it sounds — an unlatched board that swings open when someone passes is how these get written off. Ivation offers an optional mounting bracket for extra stability in busy households and the honest advice is to use it; the bracket is what turns a cabinet screwed to a wall into one that does not move. Rank 122 in Ironing Boards.
GLSCASA slim mirrored cabinet — the one for a hallway. The narrowest unit here at 3.74 inches deep, 13.98 wide and 37.4 tall, with a full-length mirror on the door so it reads as a dressing mirror when closed rather than as laundry equipment. MDF construction on a triangular bracket system that lets you set the mounting height at installation and needs no support legs, with two hooks inside for finished garments. Published support is around 25 pounds, which is a hand iron and your leaning weight and nothing heavier. Rank 149, about 19 pounds, and the installation is quoted at roughly fifteen minutes with no assembly. This is the one to choose where the wall is in a corridor or a bedroom and the thing has to not look like a cupboard.
Hideaway Premium Maple with shaker door — the one you fit once. A different proposition: all wood, custom made in the USA, 47.75 by 16 by 7 inches, in-wall — the listing says so in capitals, and it means cutting a hole. What you get for the commitment is a swivel board, a sleeve board, and a heat-shield shelf for storing the iron and the cover, which is the feature the safety section above argues for. Rank 232 in Ironing Boards, the lowest here, which reflects a specialist maker rather than a weak product. This is for a laundry room being built or refitted, where the cabinet goes in with the joinery and a shaker door matches the rest of the room. It is the wrong purchase for a wall you are not sure about.
Who should buy a freestanding board instead
Two readers, and the honest answer costs us the sale.
If you rent and cannot drill, or if your walls are solid masonry with no accessible framing, the fixing problem does not have a good solution and a wall-mounted board is the wrong product. Masonry is fixable, but it needs proper expansion anchors in sound brick, and if the plaster is old and blown you will not find sound brick where you need it.
And if you iron rarely, a freestanding board that lives behind a door is simply easier. The case for mounting one is that it gets used — two shirts on a Tuesday, because dropping a board out of the wall takes four seconds and dragging one out of a cupboard takes two minutes. If you already iron weekly without complaint, that argument does not apply to you. What might help more is a better iron; the best steam iron page covers that side.
FAQ
How do you mount an ironing board on a wall without studs?
You do not mount it to plasterboard alone. The correct method is a backing plate: screw a length of timber horizontally across two studs, then fix the cabinet to the timber wherever you want it. On masonry, use proper expansion anchors into sound brick or block, not plastic plugs in plaster. Drywall anchors by themselves creep under the leveraged load of ironing and the board will sag.
How far apart are the studs for an in-wall ironing board cabinet?
Sixteen inches on centre is the common spacing, which leaves 14.5 inches of clear space between studs, but HUD notes that 19.2-inch and 24-inch spacings are also used. Find yours with a detector and measure the actual gap, then compare it against the rough-opening dimension in the cabinet’s installation instructions rather than the carton size.
How deep is the wall cavity for a recessed ironing board?
Three and a half inches in a standard interior wall, because a nominal two-by-four stud is actually an inch and a half by three and a half. Any cabinet deeper than that will stand proud of the finished wall to some degree, which is normal for the in-wall designs but is not what most people expect from the word “recessed”.
What height should a wall-mounted ironing board be fixed at?
The height where your wrists sit slightly below your elbows with relaxed shoulders — usually around hip height and taller than people guess. Set a freestanding board to a height that feels right, iron two shirts, then measure it and mount to that figure. It cannot be adjusted afterwards without new holes.
Can you put a steam press on a wall-mounted ironing board?
No. These boards are rated around 25 to 50 pounds for the downward load of hand ironing. A domestic steam press weighs 23 to 27 pounds before you add the force of closing the lid, and that load arrives through a cantilever. A press needs a solid worktop or its own stand.
Find the studs, then choose the cabinet
The order matters, and most people do it backwards.
Find the framing first. Mark two adjacent stud centres, measure the clear gap, and establish whether you have 14.5 inches, 17.7 or 22.5. Then measure the depth you can actually use, which is three and a half inches in a standard wall. Only then look at cabinets, because those two numbers delete most of the catalogue for you and the remaining choice is genuinely about taste.
Decide the door swing and the mounting height before the drill comes out, because both are permanent and both are what people regret. Hip height, door opening away from the room you walk in from.
And fix it into wood. Studs, or a timber backing plate screwed across studs, and use the optional bracket if the maker offers one. A board that does not move is a pleasure to use and a board that flexes is an argument every week — and that difference is decided entirely in the twenty minutes you spend before anything goes on the wall, not by which unit you bought.
For most people the surface-mounted Ivation is the safe first choice: no hole in the wall, a full-size board behind a plain door, four inches of projection, and a bracket available for the households where it will get used hard.